
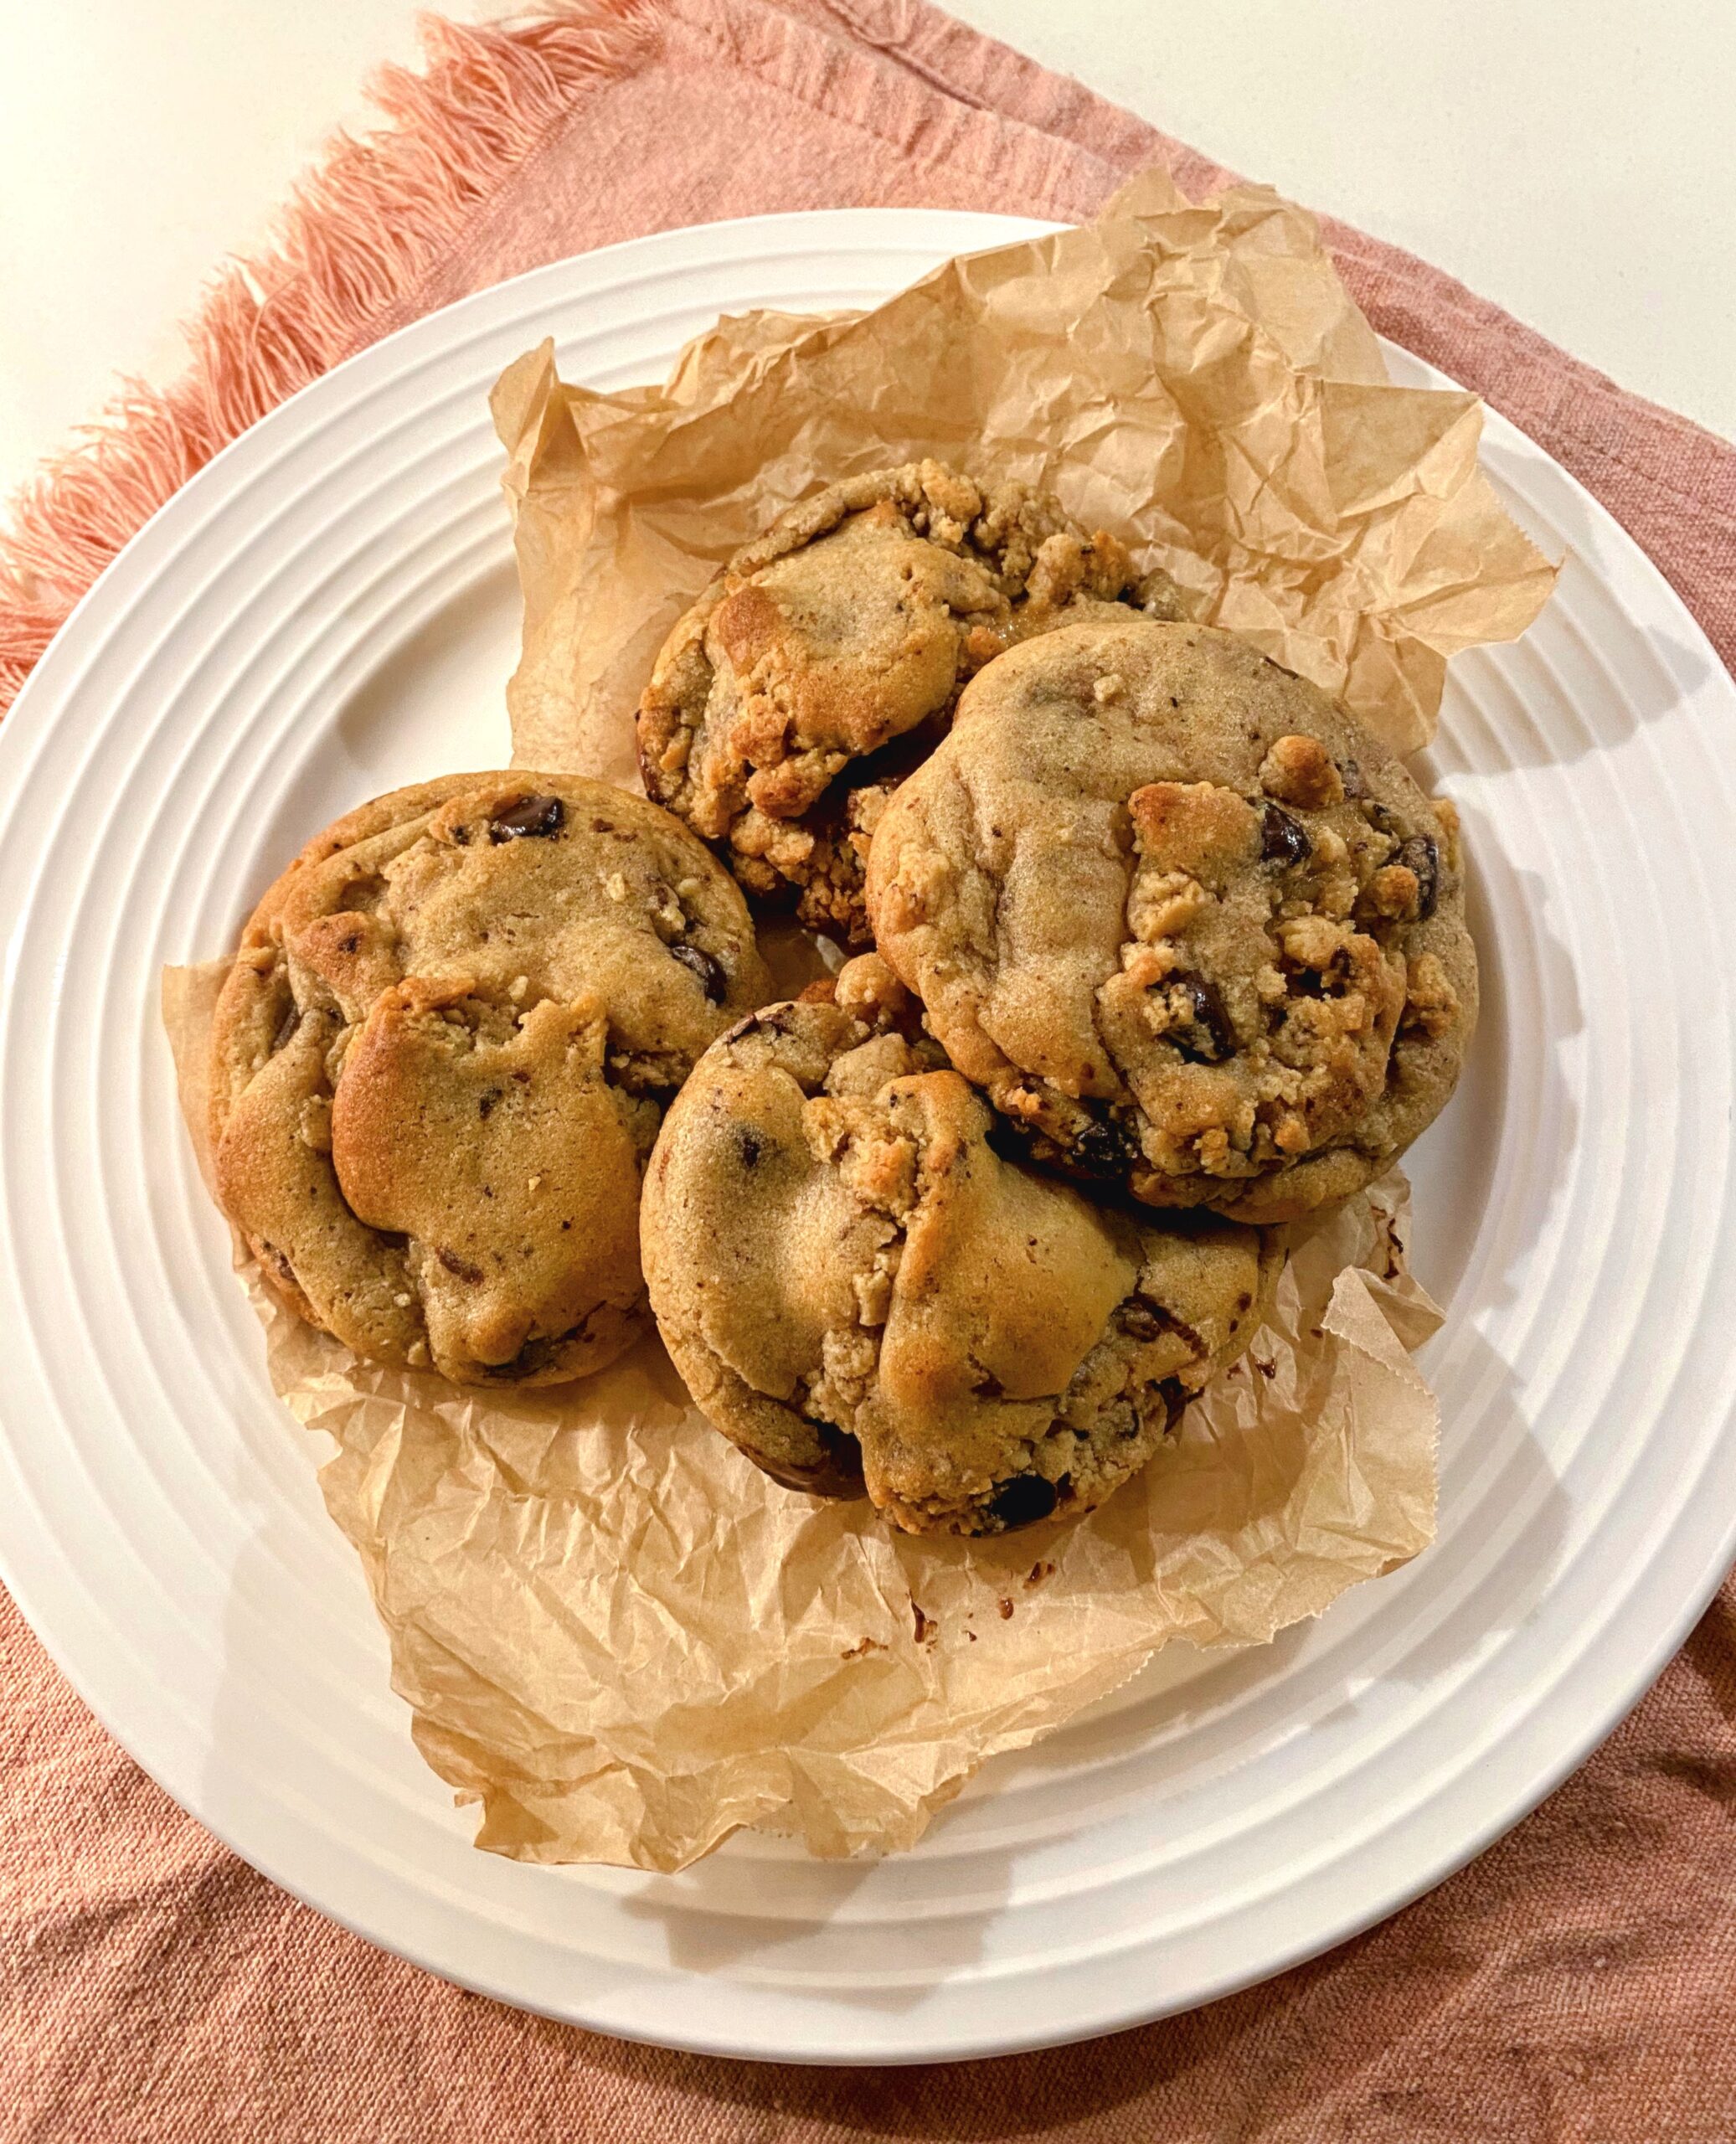
The classic chocolate chip cookie is everyones favourite: your dad, Cookie Monster, Santa Claus, it’s impossible not to love. But, are you ready to level up your cookie game?
My version of these cookies have: Brown butter for a rich and nutty flavour, caramelized edges but soft gooey centres, a unique mix of chocolate & textures, and *secret* ingredients!
What Makes These Cookies Special?
White Miso – Adds a subtle umami depth & enhances the caramel notes.
Espresso Powder – Intensifies the chocolate flavor (without it tasting like coffee).
Chips and Chunks – Layers of different chocolates for extra indulgence.
Maple Syrup – Replaces some sugar for extra chew & flavour.
Miso is a fermented soybean paste and a popular Japanese ingredient. It isn’t typically added into chocolate chip cookies, but I wanted to experiment with the saltines of it. If sea salt flakes are commonly added to cookies, I don’t see why miso wouldn’t be able to either!
I decided to use white miso paste, as it is a light, milder and sweeter variety than the red variety. I found that the spoon of miso paste I used incorporated into the dough added a very subtle oomph to it—it enhanced the brown sugar and caramel notes, and added a depth of flavour I typically don’t find in cookies. It’s an odd ingredient to add when baking, but don’t worry, your cookies won’t taste like miso!
The next ingredient is espresso powder! The espresso powder brings out the rich chocolatey goodness from the chips and chunks. I used some instant espresso but instant coffee works too; it just won’t be as rich or have that smoothness.
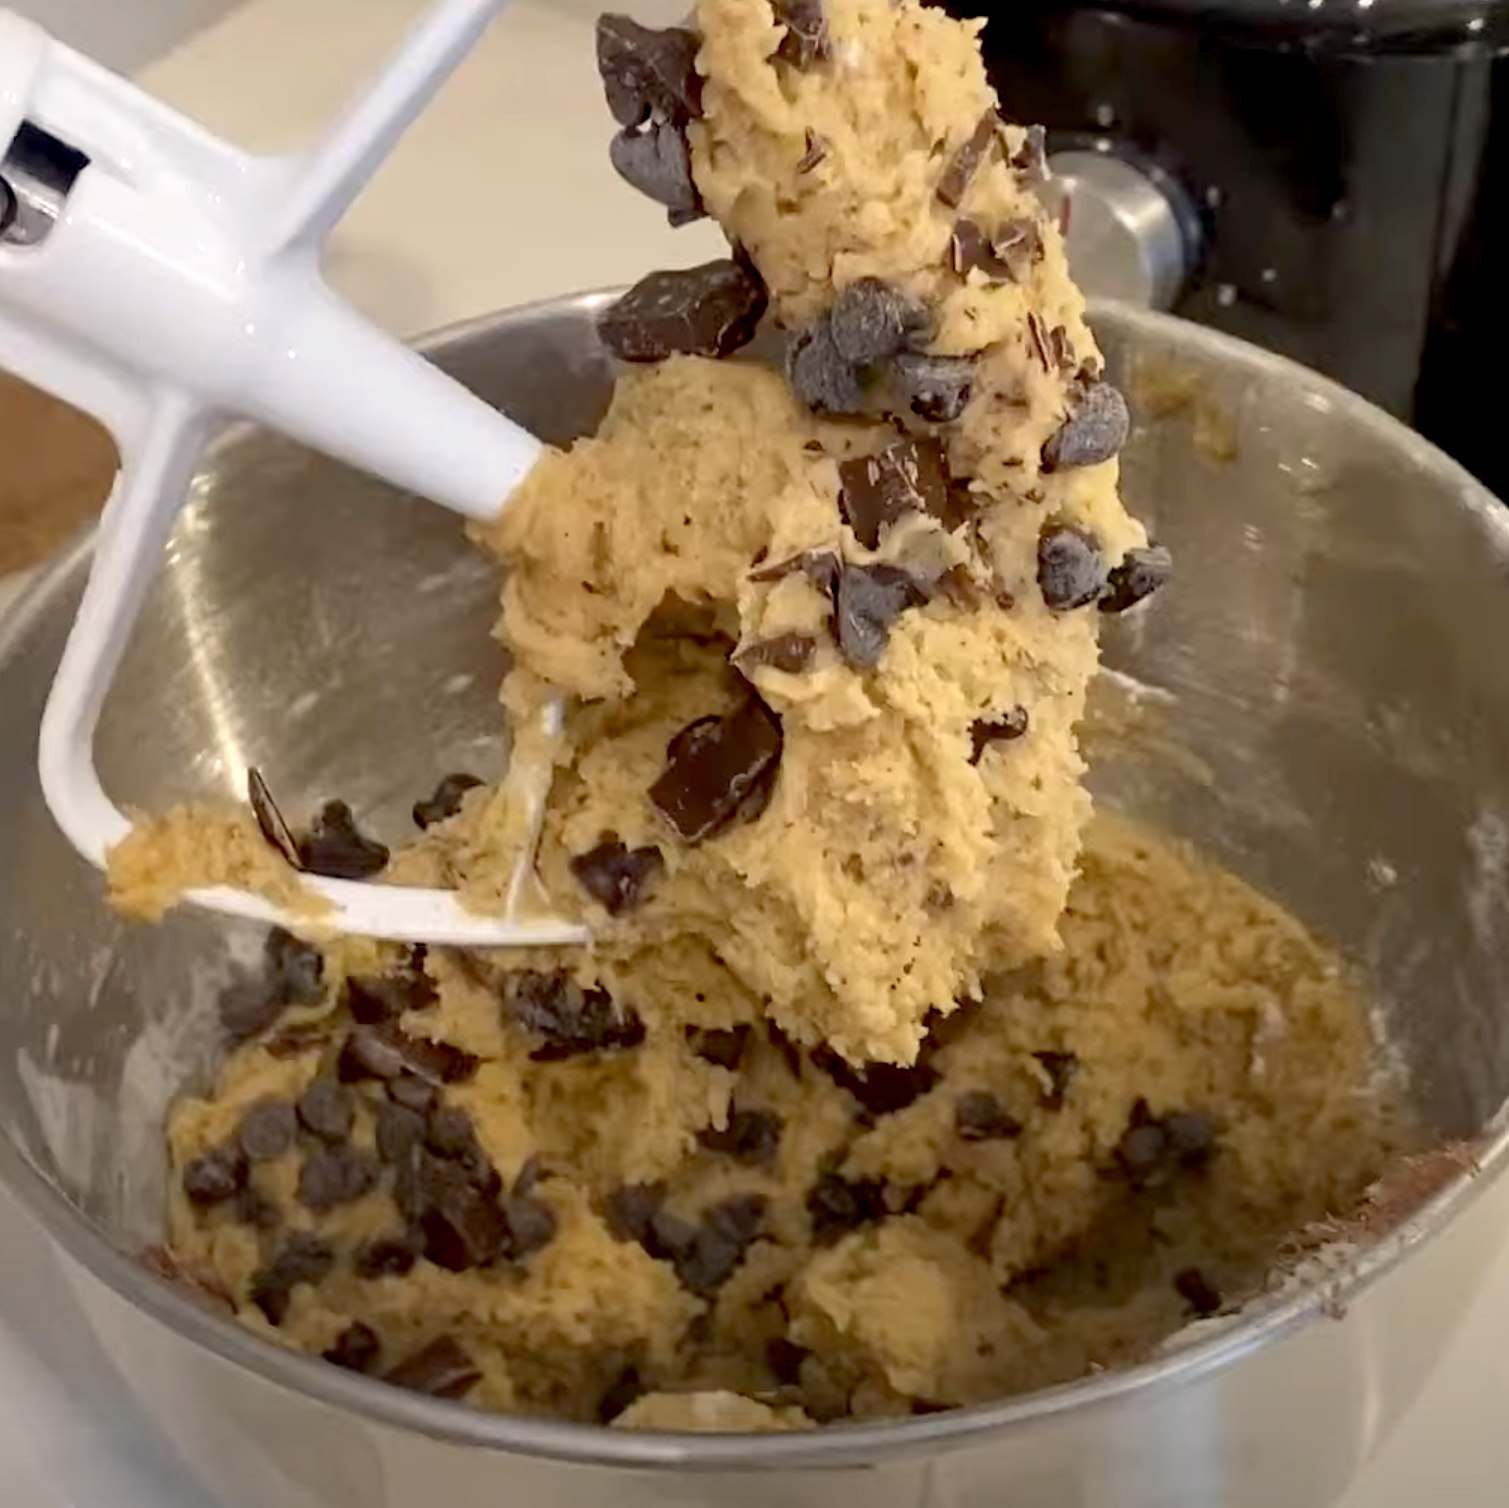
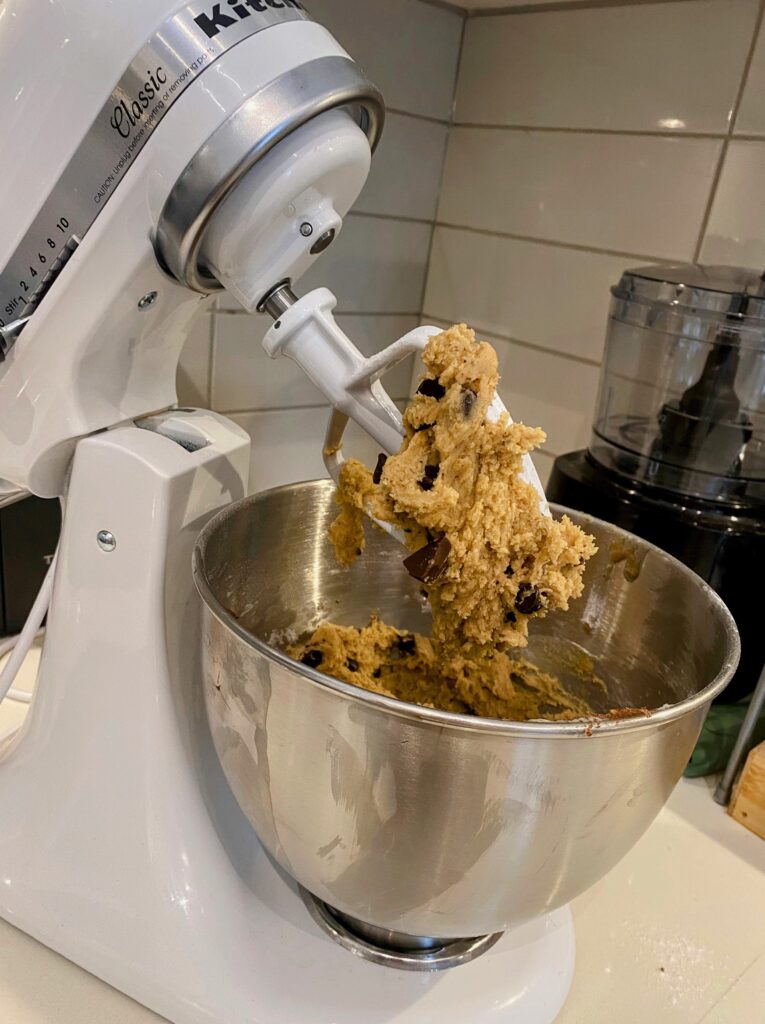
Now the popular question: chips or chunks? Why not both? Chocolate chips tend to hold their shape, while chocolate chunks are more decadent and melt into gooey deliciousness. I love to use a mixture of both, as I love the experience they both give. The amount of chocolate in these cookies is entirely up to you—I’m a huge believer in measuring with your heart!
Lastly, maple syrup! It’s a wonderful ingredient to have in these chocolate chip cookies (and no, it is not just because I’m Canadian)! Maple syrup adds that caramel taste and keeps a bit of moisture in the dough. The result is a softer and chewier bite with complex caramel notes.
Now, let’s get to baking!
Prep Time
15 minutes (+ 1 hr chill)
BAKE Time
8-10 minutes
Serves
12 Large Cookies
Ingredients
- 1 cup (227g) unsalted butter, browned
- 1 cup (200g) dark brown sugar, packed
- ¼ cup (50g) granulated sugar
- 2 tbsp maple syrup
- 1½ tsp vanilla extract
- 1 tbsp white miso paste
- 2 large eggs
- 2¼ cups (280g) all-purpose flour
- 1 tsp baking soda
- ½ tsp baking powder
- ½ tsp salt
- ½ tsp espresso powder
- ½ cup (85g) mix of dark chocolate chips and chunks *measure with your heart <3 *
Steps
1
Brown the Butter
- Melt butter in a non-stick saucepan over medium heat, stirring frequently.
- You want the butter to foam, then turn golden with a nutty aroma. At this point, you’ll begin to see bits of solid golden brown pieces form. Do not stop stirring!!
- Once you have a good amount of these brown butter pieces, pour into a bowl & let cool for 10 minutes. Be sure to get all the pieces, as the brown butter is precious in our cookie recipe.
2
Mix Wet Ingredients Together
- Make sure that all the wet ingredients are well combined before moving onto the next steps.
- In a large bowl, whisk together: brown butter, sugars, maple syrup, vanilla, and miso until combined.
- Add an egg to the wet ingredients one at a time, mixing before adding the next egg. Then, mix the second egg into the same bowl.
3
Combine Dry Ingredients
- In another bowl, whisk together the flour, baking soda, baking powder, salt, & espresso powder.
- Then, using a spatula, slowly mix the dry ingredients into the wet ingredients until they’re just combined.
- Note: No more whisks at this stage! The dough is too thick and could ruin your whisk.
4
Fold in Goodies
- Gently mix in the chocolate chunks and chips, of course measuring with your heart.
5
Chill the Dough (Essential!)
- Cover & chill for at least one hour in the fridge (or overnight for best results).
6
Bake to Perfection
- Preheat the oven to 350°F (175°C). Line a baking sheet with parchment.
- Scoop dough into large balls (~2 tbsp each).
- Note: My cookie sheet can fit 6 large balls.
- Tip: I love to use an ice-cream scoop for this!
- Bake for 10 to 12 min, until edges are golden but centers are soft.
7
Final Touches
Let the cookies cool for 5 min on the tray, then transfer to a rack. Removing the cookies too early can cause them to ruin their shape and break apart.
Tips
- For extra crispy edges & gooey centers – Bake at 375°F for 8-10 min instead.
- Let the dough rest in the fridge overnight if possible – a sleepover in the fridge deepens the flavors even more! Just remember to let it rest at room temperature for 5-10 minutes before baking.
- Use an ice-cream scoop when shaping the cookie dough balls for extra precision! Having all the cookies at the same size allows for them to cook evenly.
Freezer Tips:
- The cookie dough can be made ahead of time, and stored in the freezer for future use!
- After chilling in the fridge, shape the dough into balls and place them onto a parchment lined baking sheet.
- Let them firm up on the sheet and in the freezer for a few hours.
- Take the frozen dough balls and place into an air-tight container or freezer safe bag. Emphasis on air-tight: we don’t want any freezer burn!
- When you’re ready to use them, take the cookies out of the freezer and let it defrost in the fridge. Once thawed, bake as you normally would!
These cookies are next level—subtly umami, caramelized, and packed with rich chocolate. Let me know if you try them!